Weeks 10-12 (Design Phase): (8/22 - 9/11)
- Neil Bishop
- Sep 11, 2022
- 8 min read

Updated: Sep 11, 2022
GUI Functionality:
The GUI in this project is used to control the mic stand remotely by sending data to the Arduino through Bluetooth serial communication. This is done by sending a position between 0 and 180 degrees to the Arduino which will then be written to the servos. To implement this, we continue adding a functionality to the GUI that will update the position of the servos and send that information to the Arduino. In this section we will only print out to the console the position until the serial communication is established.
First, let’s simplify the logic and go over the intended functionality. Since each motor has a rotation of 0-180 degrees which includes its full range of motion, they only require one variable to hold it’s position value. For instance, if the up and down motor of the arm is pointed straight up, this will be at 180 degrees. If it is pointed down, then the motor is at 0 degrees. This simplifies much of the logic and only requires the program to keep track of 3 variables and to make sure they do not go above 180 and below 0. In the context of the GUI, the user will press up, down, left, right, tilt up, or tilt down and the program will increment or decrement the variables depending on the direction the user chooses. The variables used will be global variables and will be named to represent the motor they will control. The reason they will be global variables is so that all functions in the program are able to adjust their values.

To implement the increment/decrement functionality, I made 3 functions that would be used to increment or decrement those variables depending on the direction in which the user chooses on the GUI. For example, if the user pressed UP on the Arm section of the GUI, then the up/down variable would be incremented. These will be called upDown(), leftRight(), and tilt(). The code checks if the argument passed into the function is TRUE or FALSE and determines which “direction” it is going. Then it checks if the value of variable is within 0-180 to make sure it is not incrementing or decrementing beyond that range. Finally, it is incremented or decremented depending on the user input. As an error catch the program currently prints “not valid” to the console if the values some how are changed beyond the range. The functionality for the upDown function is the same as the leftRight and tilt functions as well.

Since the TKinter library allows for a function call when pressing a button, these functions would be called but with the respective argument representing the direction. The following figure shows what this would look like in code.

To keep track of these on the GUI a function was also made called showPositions(). This function simply updates the text of the labels created in the GUI that represent the position of each Arm motor in degrees. It will be placed inside the arm movement functions so that they will be called each time the variables are changed.

Preset Functionality:
A big part of this project is the ability to save the positions of each motor as a preset and to be able to recall those presets. Since the position variables are all global, the presets can easily be saved by pushing the values into an array. First, an array must be made for the presets.

This will be an array of arrays and each array will be set to the reference position where all motors are set to 90 degrees. The next step is to create a function so that when the user presses the Record Mode button and activates the record mode, then the user is able to save the current values of the arm position. This function will be called recordModeOn(). This function takes in a Boolean argument like the arm movement functions. If TRUE the record mode is on, if it is FALSE, then the record mode is turned off. Also, a global variable called recordMode is used to keep track of whether it is on or off. The record mode function simply changes the recordMode variable to TRUE if the button is pressed and updates the GUI to show that the record mode is on.


The preset function is called presetFunc() and takes in two arguments. The first is the preset number and the second is if the record mode is on or off. If the record mode is on, then the array corresponding with the preset is changed to the current values of the arm position variables in order of up_down,left_right, and tilt. If record mode is off, then the arm position variables are given the values of the particular preset number and the positions are updated on the GUI.


Establishing a Bluetooth Connection:
Now that the GUI is functioning in a way that is useable, we can continue on to establishing a Bluetooth connection between the PC and the HC-05 Bluetooth module connected to Arduino. The connection between the HC-05 and PC is done using the built-in Arduino library called SoftwareSerial.h. This library is a means of establishing a serial communication between Arduino and another device. This library is first initialized by including the library and creating an object of the SoftwareSerial class. This object will be name BT and the Transmitter (TX) and Reciever (RX) channels will be initialized on pins 10 and 11 respectively.

Next, the BT object is started using a baud rate of 9600Hz and prints a message to the console showing it has initialized correctly.

Serial communication is done using a buffer that when sent information will fill up and waits for the program to empty that buffer. The only data type allowed to be transmitted are “chars” which are single characters of a string. In our case, numerical values can be sent through serial communication as a string of chars and then converted back into numerical values.
When something is transmitted to the buffer, a function called available() can be used to check if something is in the buffer. Then functions such as read() and other functions, which I will explain further in the arm functionality section, can be used to read the incoming data and use it in the program. So to test the Bluetooth functionality I first made a simple program that takes in a value and prints out a message. It first checks if the buffer has any data stored, then reads that data and stores the value into a variable called num. Then depending on if the message is 1 or 2 it will print out a message. Next, the hardware will be connected and a connection established.

The HC-05’s receiver channel (RX) and transmitter channel (TX) are connected to the Arduino on pins 11 and 10 respectively. The VCC is connected to the 3.3V and the ground connected to the ground on the Arduino.
Then the Arduino is turned on and the HC-05 blinks rapidly to show that a connection hasn’t been made but it is turned on. Now the Bluetooth device manager on Windows is opened and the HC-05 can be found by scanning local Bluetooth devices. Once the HC-05 is found it can be paired with the PC and will show up like the following figure.

By clicking on “More Bluetooth options” at the bottom of the menu, the com ports are shown for the Bluetooth devices. Since we are only transmitting data will only need Outgoing direction on COM3. This will be more useful later but for now this is how we will know what channel to set in the Arduino IDE.

Now that the Bluetooth connection is established, we simply upload the program on to the Arduino and open up the Serial Monitor in the Arduino IDE. Once the serial monitor is started the message “Hello from Arduino” is printed and after typing in 1,2, and 1 again the message corresponding to those outputs are printed as well. With this simple program we are now ready to work on the functionality of the Arduino Arm robotics logic.

Arduino Arm Robotics Functionality:
The functionality of the arm section of the project relies on 3 servo motors to maneuver the microphone from one position to the next. These servos can be programmed simply using a built-in function from the Arduino library called Servo.h. This function is called write() which takes a position in degrees as its argument and writes it to the servo. This allows the program to dictate the position of each motor to precise locations.
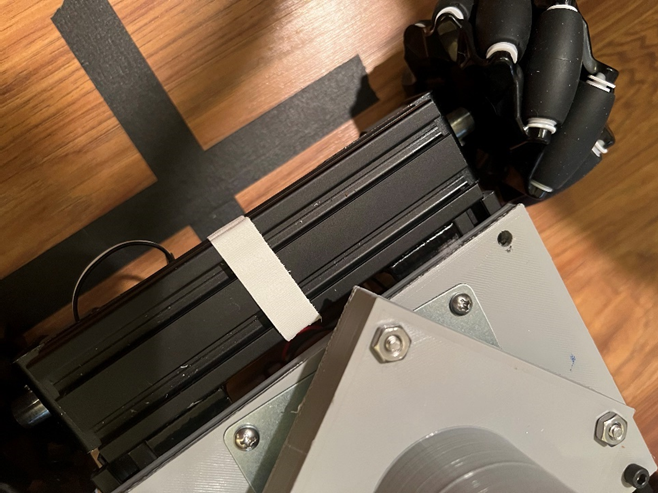
To program the servos, they must be initialized creating an object of the Servo library, assigning their pins, and activating them when they are used. Since this program will be using 3 servos, each object of the servo library will be initialized with their respective motor names. As a test to the program, I used hobby servos and connected them to pins 3,5 and 7. The next step is to use the Servo library function called attach() which activates the servo and allows the program to write to it. The function detach() is also used but only for a reason I will explain further.

While programming the servos I ran into an issue between the SoftwareSerial and Servo libraries. When the SoftwareSerial library is used it can interfere electronically with the servo functions. So as a work around, anytime the servo is used, I activate it, write to it, then detach it until it is selected again.

The bulk of the program just needs to save the incoming position to a variable and writing that value to the servo. Also, the program will need a way of determining which motor is to be moved as well such as if it is a chassis or an arm movement. To do this, we use an indicator value which we will call “ind”. This variable will be assigned a value between 1 and 7 and attached to the incoming position value. The chassis movements which are forward, backward, left, and right will be 1,2,3,4 respectively and the up/down, left/right, tilt up/down will be 5,6,7 respectively.
When the program receives incoming data it will use the function readStringUntil() to gather the data and save it to a variable called data_in. The reason that readStringUntil() is used is so that the program knows where the incoming message stops which will be a terminating character “\n”. This will be appended to the outgoing message in the GUI program.

The indicator value will be at the beginning of the message and “plucked out” of the string and saved into the variable “ind”. This char will be converted into a numerical value and checked if the value is between 1-4 for chassis movement or if it is between 5-7 which would indicate that it is an arm movement. Then the rest of the data_in string is stored in a variable called “pos” for position and the indicator is checked to see which motor it represents. Finally, the selected servo is sent the position and the Arduino waits for more information.

Combining GUI with the Arduino program:
Now that we have both GUI and Arduino functioning, we can combine the two and test how they communicate with each other.
Automatically Connecting to Bluetooth Device:
A main concern we had for the RCMS is user friendly operation. A big component of that is making sure the device can automatically be detected by the software and connected.

Originally the COM port had to be manually found in the Bluetooth settings and then hardcoded into the programs code. So to work around this I found a post on Stack Overflow that uses the same serial communication library called Pyserial. It uses methods of the Serial class called tools.list_ports.comports() to search for the devices that are incoming and outgoing. Since our project needs the outgoing COM port of the HC-05, we search through the Bluetooth devices and find the port that is outgoing and then use that to find which COM port that is and then connect to it.


The solution can be found at this address.

Comments